01
When Does a Window Help Sell the Snack?
A window helps only when the visible product looks consistent, appealing, and easy to understand in the real filled pouch.
We use windows to show texture, piece size, color, or ingredient mix when those traits answer a buyer question. We test the view after normal settling and shipping.
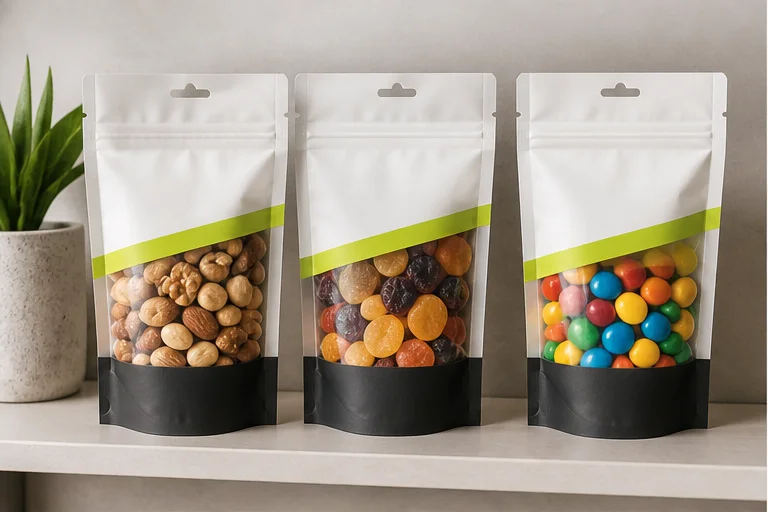
We decide what the shopper needs to see
We begin with a sales question. Does the product have a natural color, large pieces, premium coating, or visible mix that is hard to communicate with photography? If yes, a window may reduce uncertainty. If the product creates many fines, changes color, or settles below the visible area, the same window can work against the brand. We do not add one because the category commonly uses kraft window bags.
We fill unprinted prototypes and place them at the expected shelf height. We look from the normal shopping distance. We check how much product is visible after the pouch settles and after the case is handled. We rotate the pouch and check reflections. We also photograph it with a phone because ecommerce thumbnails and social images can make a clear film reflect the studio or hide the product.
We compare the window with an opaque design using the same product and layout. The opaque pack may have more space for flavor, nutrition, instructions, and brand hierarchy. The windowed pack may show the product more directly. We connect both options to the custom snack pouch with window and choose from observed buyer information needs, not a trend word alone.
| Window goal | What we test | Reason to reject it |
|---|---|---|
| Show piece quality | Visibility after normal settling | Broken or inconsistent pieces dominate |
| Show mix variety | Representative ingredient distribution | Heavy pieces leave the window area |
| Build product trust | Shelf and online comprehension | The window adds glare or confusion |
02
How Does a Window Change Barrier and Structure?
A transparent patch can become the weakest area if its material and converted edges do not match the product need.
We treat the window as part of the final laminate. We compare its OTR, WVTR, light transmission, seal behavior, stiffness, and converting details with the opaque area.
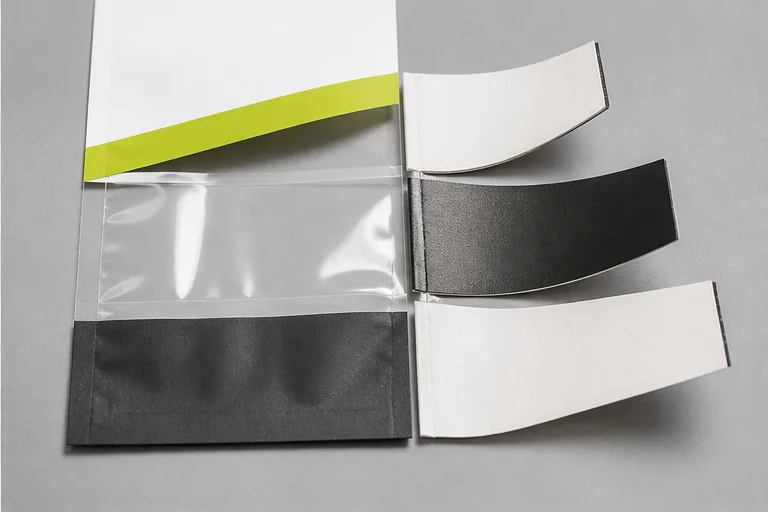
We request data for the exact windowed construction
We ask how the window is created. Some pouches use a clear laminate with selective opaque printing or layers. Other constructions may use a defined window area within a different visual system. The exact method affects barrier, stiffness, appearance, and recyclability claims. We do not assume a printed “paper” look means the structure is paper, and we do not assume a shiny film is a specific polymer.
We compare transmission data for the window area and the rest of the pouch. We keep test conditions with every value. We also examine the window edges, gusset folds, and seal areas after converting. If the window crosses a curved or folded area, the view can distort and the structure can respond differently. We keep it away from critical seal zones unless the approved construction and trial support that placement.
Light is a separate question. A transparent high-barrier film can still admit light. If the product may change under retail or warehouse lighting, we include the window size and location in the product study. We use the stand up pouch material structure guide to record the exact outside-to-inside direction for both visible zones. This lets the technical team evaluate the same design that the shopper will see.
| Window property | Data we request | Filled-pack check |
|---|---|---|
| Moisture and oxygen barrier | OTR and WVTR with conditions | Product quality at the window area |
| Light transmission | Clear-area description or data | Color and flavor review |
| Stiffness and converting | Exact construction and drawing | Wrinkles, folds, and standing shape |
03
Where Should We Place the Window and Artwork?
A window can collide with the gusset, zipper, seals, barcode, required copy, or the product’s settled fill line.
We place the window after we mark seals, folds, zipper, tear notch, barcode, required information, and real fill height. We keep the main brand message readable without the product view.
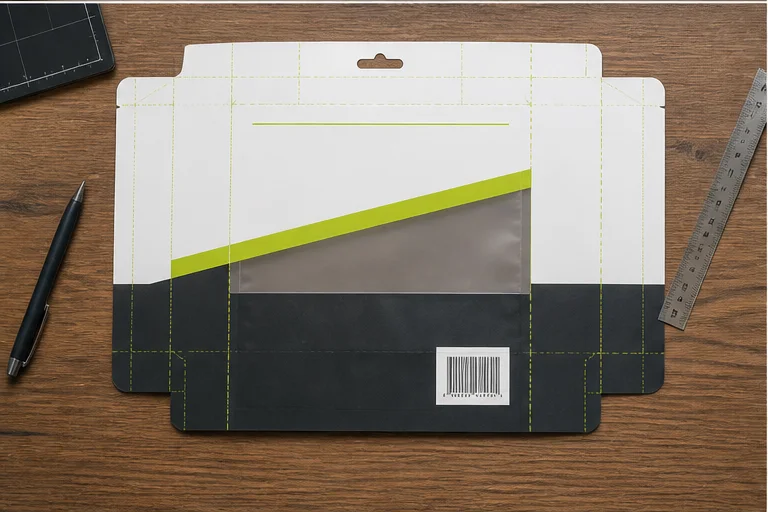
We build one functional artwork map
We start with the approved pouch dieline. We mark the side seals, bottom gusset folds, zipper, tear notch, top seal, and any hang hole. We add the likely loose and settled product heights. We then reserve space for the product name, flavor, net contents, required statements, barcode, and other market-specific information. The remaining area becomes the honest window opportunity.
We avoid placing the window where the pouch shape will make the product view misleading. A low window can show only the gusset fold or a dense settled layer. A very high window can show empty headspace. A window close to a side seal can look uneven after pouch-making. We test the final shape with printed or accurately marked prototypes.
We protect scan performance. GS1 advises teams to consider the packaging process and avoid locations where a barcode may be obscured or damaged, such as a fold or flap.[1] Flexible pouches also wrinkle and curve, so we verify the printed barcode on the filled pack in its real condition. We use the custom pouch dieline guide to keep the window and barcode on the same controlled artwork map rather than approving them in separate files.
| Zone | What we protect | Verification |
|---|---|---|
| Window | Real product view after settling | Filled visual prototype |
| Barcode | Flat, clear, scannable placement | Verification on filled packs |
| Functional top | Notch, zipper, grip, and seal | Opening and line trial |
04
How Do We Approve a Windowed Snack Pouch?
An empty print sample cannot show how the product, light, wrinkles, settling, and distribution will change the window.
We approve a windowed pouch with filled visual samples, barrier evidence, product storage results, barcode checks, opening trials, and representative case handling.
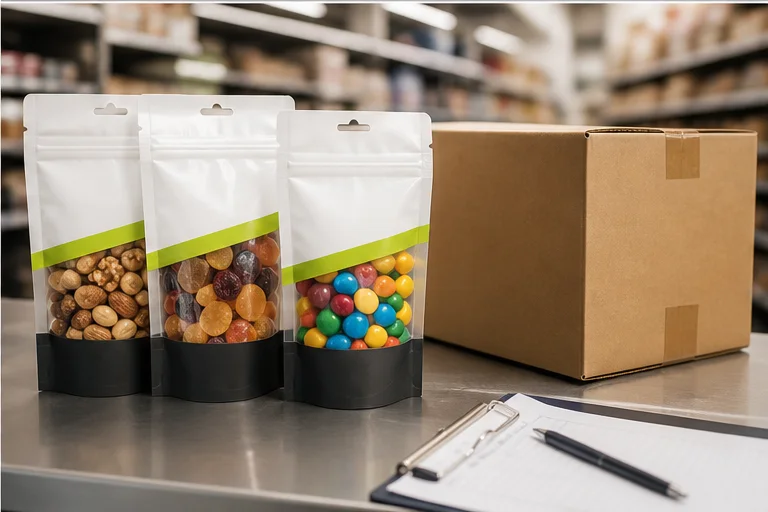
We review appearance and protection together
We fill samples from normal production variation. We include pieces with different sizes and colors so the window does not receive an unrealistic hand-picked display. We check the front after loose fill, settling, and case handling. We photograph the pouch under retail-style light and controlled studio light. We record glare, wrinkles, product visibility, and any empty-looking area.
We then review technical evidence. We confirm the exact window construction, food-contact support for the intended use, barrier data with conditions, seal and zipper details, and the product shelf-life protocol. If the window changes the material direction from the opaque candidate, we do not carry over the old test result by assumption. We test the final construction.
We finish with use and distribution. We open and reclose the pouch, inspect the clear area for scratching or stress, verify the barcode, and pack units into the intended case. We look for rubbing between windows and printed faces. We keep the result in the pouch sample approval guide with the artwork revision and product lot. We approve the window only when it supports the sales goal without hiding an unresolved protection or production risk.
| Approval lens | Evidence | Decision |
|---|---|---|
| Sales view | Filled shelf and image review | Does the window clarify the product? |
| Technical protection | Construction and shelf-life evidence | Does the final pack meet the defined need? |
| Operations | Fill, scan, and case handling | Can the design repeat in production? |
Conclusion
We use a clear window only when the real product view improves the sale and the final construction passes the same technical approval as every other pouch.
Sources and further reading
- GS1: Ten Steps to Barcode a Product (cited in article)
- FDA: Food Packaging and Other Food-Contact Substances (further reading)
- ASTM F1249: Water Vapor Transmission Rate Through Plastic Film (further reading)
Reddit links are community insight only. We use official standards and regulator pages for technical context, and we require project evidence for the final pouch decision.