01
How do I choose a stand up pouch size?
Choose a starting size from the target fill weight, the representative product volume, filling method, required headspace, closure and seal clearances, and case-packing limits. Then fill and seal a candidate pouch with the intended product and process. A universal weight chart cannot approve the final size because density, particle shape, trapped air and handling behavior differ.
- Representative product and target fill
- Candidate pouch geometry
- Filling, closing and sealing route
- Filled-pouch and case-pack decision
02
How do I calculate the volume a snack pouch needs?
Measure bulk density using a representative portion: bulk density in g/mL = product mass in grams ÷ occupied volume in millilitres. Required product volume in mL = target fill weight in grams ÷ measured bulk density in g/mL. Use the same loose or settled filling method for both measurements; millilitres and cubic centimetres are numerically equal.
Illustrative arithmetic only: if a measured sample weighs 100 g and occupies 400 mL, its bulk density is 0.25 g/mL. A 150 g target fill would occupy about 600 mL under the same conditions. That is product volume, not a 600 mL pouch specification: the candidate still needs process headspace and closure clearance, verified in a filled sample. These numbers are not measured StandPouchy product data.
- Measure mass and occupied volume together
- Use consistent filling and settling conditions
- Calculate product volume before choosing a pouch
- Validate headspace and the final geometry separately
03
How many grams fit in a 5 × 8 inch stand up pouch?
A 5 × 8 inch flat face is 127 × 203.2 mm, but it does not define gram capacity. You also need the bottom-gusset convention, seal margins, zipper position, usable opening and the actual product density. Popcorn and nuts can need different pouch volumes at the same fill weight.
Do not multiply flat width × flat height × gusset to promise usable pouch volume. A flexible gusseted pouch is not a rectangular box, and its seals, curved filled shape and closure zones reduce usable space. Send the existing pouch drawing or a filled sample alongside the target weight for a meaningful size review.
- Convert drawing units: 1 inch = 25.4 mm
- Record the full bottom-gusset convention
- Separate flat dimensions from usable fill space
- Confirm gram capacity with the actual product
04
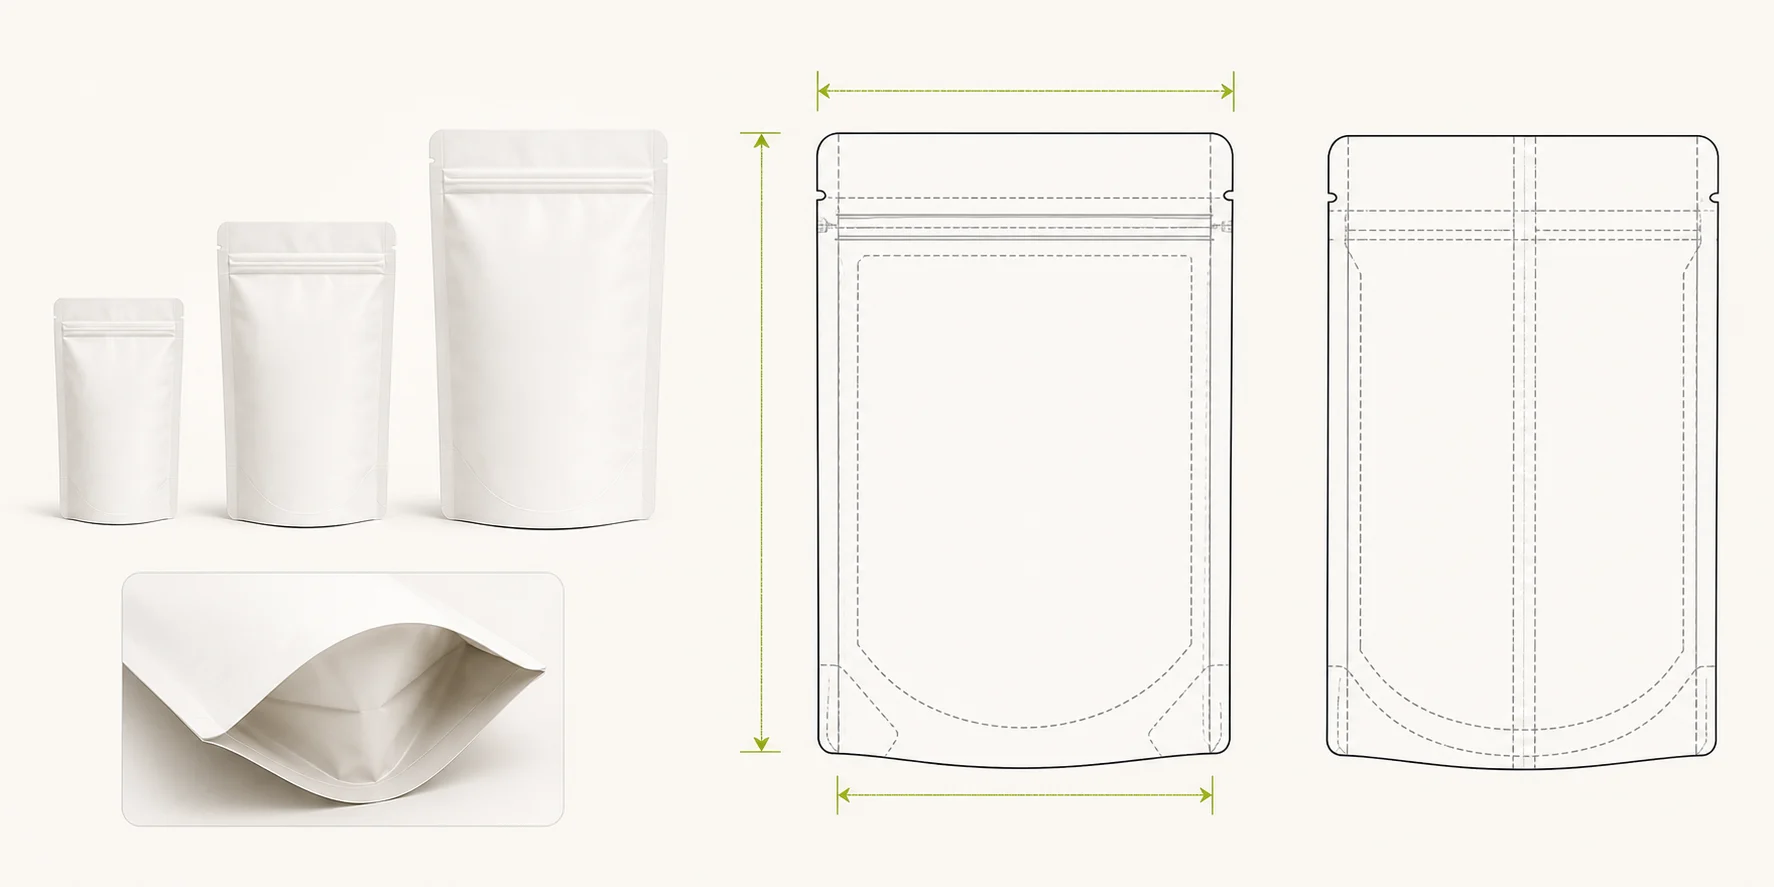
Read width, height and bottom gusset together
Width controls the flat face and helps define the filling opening. Height must accommodate the filled product, intended headspace, zipper and top-seal zone. The bottom gusset unfolds as the pouch fills and influences standing depth and usable shape.
Dimension notation is not universal. One drawing may state the total opened bottom depth while another states a folded-gusset leg or uses a different reference line. Record the exact drawing convention instead of comparing three numbers without the matching dieline.
- Width: flat face dimension
- Height: top seal to bottom edge
- Bottom gusset: filled standing depth
- Dimension reference points and tolerance convention
05
Measure the product and the pouch as separate records
The same weight can occupy different volumes. Coffee beans, ground coffee, pet treats, powders and irregular snacks settle differently, and the packing line can introduce or remove air. Record the representative product condition and filling sequence alongside the target fill weight.
Measure an empty pouch against its drawing, then record the filled shape separately. Outside bounding dimensions of a filled pack do not replace the flat width, height and gusset values used for the dieline and converting specification.
- Product batch or physical condition
- Loose, settled or process-filled behavior
- Manual or automated filling method
- Empty flat dimensions and filled-pack observations
06
Allow space for closure, seals and features
The usable internal area is smaller than the outside dimensions. Keep the intended fill below the closure and leave the approved top-seal area clear. Confirm that the filling opening works with the product and equipment rather than treating face width as the only opening dimension.
Artwork and features also consume controlled space. Review the bottom fold, zipper, tear notch, valve, window and hang-hole locations on the same dieline so a size change does not silently create a filling, sealing or artwork conflict.
- Top seal and zipper clearance
- Target fill line and headspace
- Tear-notch and feature positions
- Printable, safe and fold areas
07
Compare candidates using the same fill procedure
Where the starting geometry is uncertain, compare candidate pouches using the same representative product, target fill, filling sequence and closing method. Record what changed instead of relying on appearance alone. A wider pouch may improve access but change shelf facing; a taller pouch may add headspace but affect case packing; a larger gusset may change the filled footprint.
- Keep the product and fill procedure constant
- Record standing footprint and shelf facing
- Review opening access and closure use
- Check carton orientation and packing count separately
08
Confirm the final direction with a filled-pouch review
A chart, volume estimate or previous pouch can narrow the options but cannot approve the final size. Fill, close and seal the candidate as intended, then review fill level, top clearance, standing stability, closure access, visible distortion, handling and packout. Record the accepted pouch and dieline revision so a later size change triggers a new review.
- Fill with the intended product
- Check standing, opening and closing behavior
- Review handling and case packing
- Approve the pouch, dieline and specification revision
Field map
Record the inputs behind the size decision.
This field map records how a candidate size was selected. It contains no universal capacity chart or approval value; project measurements and acceptance criteria must be supplied by the buyer and converter.
| Field | What to record | Why it matters | Approval evidence |
|---|---|---|---|
| Product identity | Product name, physical form, representative batch or condition | Links the size decision to the material actually filled | Named sample and review date |
| Target fill | Nominal fill weight and permitted project variation | Defines the amount the pouch must receive | Agreed project specification |
| Volume behavior | Loose, settled or process-filled volume and preparation method | Separates weight from occupied space and trapped air | Recorded measurement method and sample |
| Filling route | Manual or automated method, opening access and product flow | The equipment and product must enter without contaminating controlled areas | Representative filling observation |
| Flat width | Drawing reference points, value and tolerance | Controls face width, opening and artwork geometry | Approved dieline measurement |
| Flat height | Bottom-to-top reference, value and tolerance | Allocates fill, closure and top-seal zones | Approved dieline measurement |
| Bottom gusset | Construction, reference convention, value and tolerance | Defines how the base opens and stands | Dieline plus filled-base observation |
| Closure and top seal | Zipper reference, fill line, headspace and final seal clearance | Prevents product from occupying the closure or seal area | Filled and sealed candidate |
| Other features | Valve, window, notch or hang-hole coordinates and clearances | Keeps functional features aligned after a size change | Approved feature drawing |
| Filled-pouch review | Standing, distortion, access, reclosure and observable handling results | Tests the geometry with the intended use rather than an empty sample | Named candidate and decision record |
| Case packing | Filled footprint, carton orientation and packing arrangement | Connects pouch geometry to downstream packout | Representative packout review |
| Revision decision | Accepted size, open issues, approvers and revision date | Prevents an obsolete sample or drawing from becoming the production reference | Controlled specification and approval |